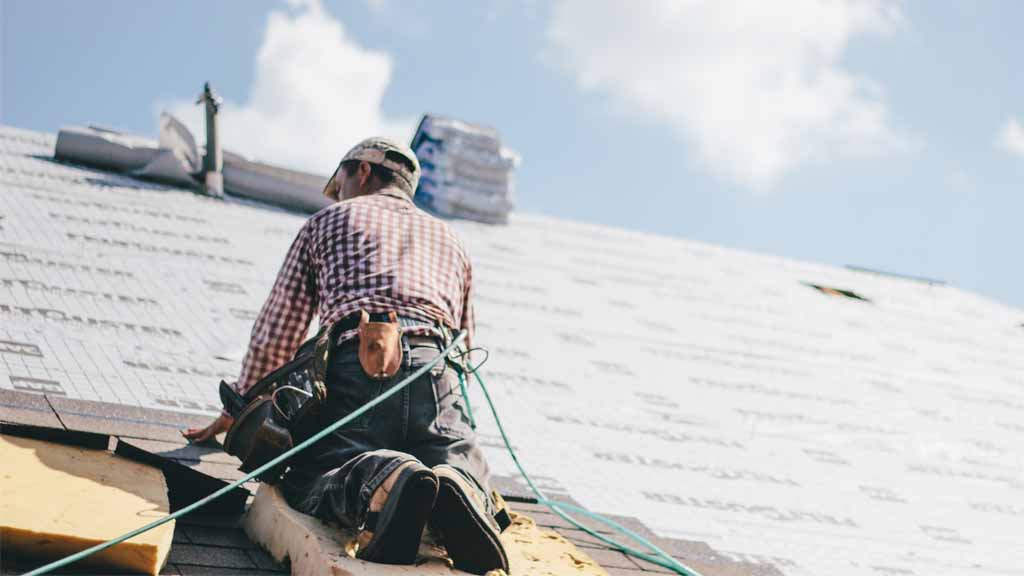
Removing shingles can be dangerous, especially if you don’t know the right equipment. We’ll look at how to remove and replace shingles safely.
If your roof is starting to show its age, you may be considering a roof replacement. But before installing new shingles, you need to . remove roof shingles from the old ones. Here’s how to do it safely without breaking any existing shingles.
Assemble All Your Supplies
Before you begin to remove roof shingles , ensure you have all the necessary supplies and equipment. This includes:
- Safety equipment. Wear a respirator, goggles, and gloves to protect yourself from dust and debris.
- Roofing tools like a hammer, utility knife, tape measure, and chalk line will help you determine where to cut shingles for removal.
A ladder that’s tall enough to reach your roof but not so tall that it might fall over can also be used when removing shingles from high places.
It should be stable on an even surface, such as concrete or asphalt, so it doesn’t fall over if bumped by anyone walking by while working up there. Place mats under the bottom two steps of the ladder to keep them from slipping if they get wet due to rainwater runoff on your roof.
Prepare Your Work Area
Before starting, it’s essential to ensure your work area is clean and dry. Make sure you have plenty of space to move around, remove old shingles, and install new ones. You’ll also need a way to dispose of the old shingles.
If you don’t have a dumpster or large container on hand to store them in until pickup by the city, you’ll need a place to store them temporarily.
You should also make sure that all other equipment for this job is available:
- Tools and supplies such as tape measures
- Roofing materials like nails or screws
- Hardware like concrete anchors
- Ladder
You may even want some help with this project—it’s not difficult but still requires careful thoughtfulness throughout the process.
Whenever you remove roof shingles, consider layering a tarp under the first row so that you don’t have to worry about debris falling on your head while working.
The first thing you’ll want to do is prepare the roof for installation. If holes are damaged, patch them with tar or felt paper. If loose nails stick out of your shingles, hammer them down flush with the surface.
Prep on the ground.Set up an environment where you can grab your tools and equipment quickly and throw away all the pieces of shingles when you come down using the ladder.
You can consider renting a trash container carrying most of the roofs. For safety purposes, nail the roof jackets below the area you plan to tear off first. Space the coat no more than 4 ft apart and fix it to the rafters with at least three 16d nails through the roof sheathing and then nail on a 2×10 to prevent you from sliding off the roof.
Gear up with safety tools – your safety matters the most. Ensure a safety harness, line, and anchor to fasten it on the roof peak. Wear slip-resistant rubber shoes, long pants and sleeves to protect your skin from scratching, work gloves, and safety glasses.
Keep in mind that tearing off the roofs is an intense physical activity. If you aren’t feeling well or have physical problems, do not do it until you are fully prepared to do so.
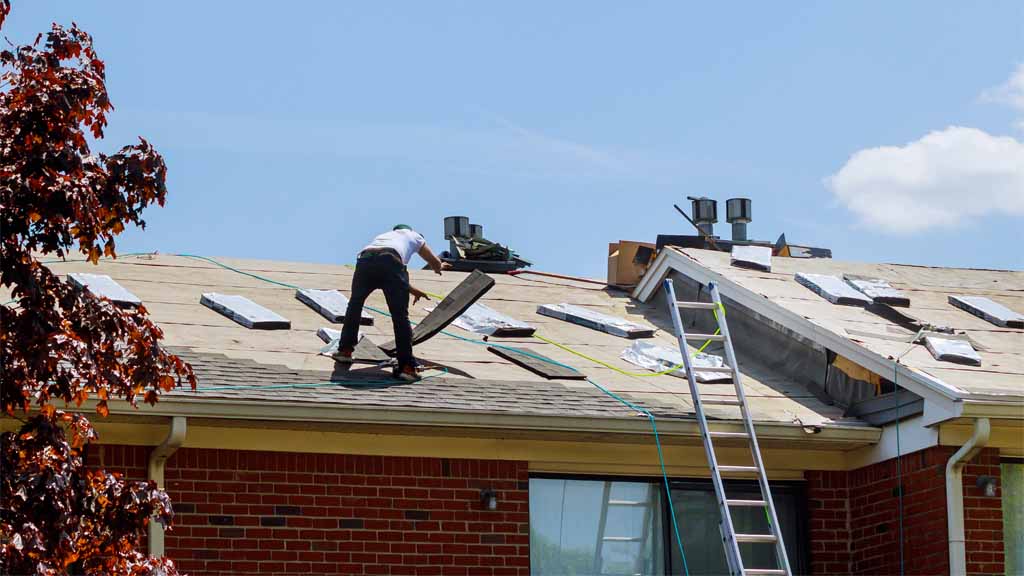
Start from the peak, then go downwards. Once you are geared up with safety tools and have everything prepared on the ground, start from the farthest peak part of the trash container.
Stand at the peak and tear off the ridge caps and the top courses of shingles using a garden fork. A garden fork is an excellent tool because it doesn’t get caught on nails, making the process faster.
From there, tear off the shingles going downwards. Once the pile of shingles gets loose, it will start sliding off and down to the roof jacks. Continue to do so until the scaffolding board is full of shingles.

Starting Point And Remove Shingles.
Start at the bottom of the roof, and work your way up. Check the condition of the flashing and work around it. It is usually recommended to replace all the flashing.
If the flashing is installed with complexity and is in good condition, it is okay to keep and work around it. If you own the flashing, remove the nails around it using a pry bar. Also, altogether . remove roof shingles and underlayment around the flashing.
- Remove shingles in a zigzag pattern, starting with one as close to the roof’s edge as possible.
- Do not remove the first row of shingles if you can avoid it – it will be easier for everyone to walk on later if you don’t!
- Remove each piece one at a time, pulling gently towards yourself before hitting it with your hammer. Use your hammer only when necessary, as hitting too hard could cause damage to parts of your home not designed for this kind of activity.
- Be especially careful around nails; use care not to hit them too hard, so they don’t bend or break inside the holes in wood decking boards underneath – this could weaken their strength over time.
- Remove shingles on the roof’s edges once you’ve thrown the shingles into the trash container. It is time to remove the roof jacks and work on the roof’s edges. Just like how you did, using a fork, go downward, tearing off the shingles. Make sure to remove the ice barriers if there are any on the roof.
- Work from the bottom up so that water doesn’t run down on top of the head while working near the edge/middle part where most impact happens during the removal process – otherwise, safety glasses won’t protect eyes very well! Also, try keeping things dry by using a garden hose if needed.
- Remove the valley and vent flashing. Valley and vent flashing are not worth using again. Valley flashing is where all the rain, snow, and dirt pile up and slide down to the ground. One of the fastest things that fades and needs to be replaced.
Start at the top of the valley, use a fork and a flat bar to tear off till the bottom part of the valley comes off. Use a pry bar to remove the vent flashing. Once you’ve You can remove roof shingles safely without breaking them by following these simple steps. , inspect your roof for any damage. Make repairs before installing new shingles if there are any holes or other problems.
Once you’ve determined that the roof has no problems, it’s time to install new shingles. Start by nailing down plastic sheeting on top of your deck to prevent debris from falling onto other parts of your home while you work. Next, lay down a few rows of starter strips at one end of your roof and lay shingles in place. When finished with this side, turn around and repeat on the opposite side.
Save The Nails For Reuse.
- Save the nails for reuse. Some contractors will use a nail puller to remove the old shingles, but if you want to save money and be more environmentally friendly, consider keeping the nails for future projects.
- Check your roof decking material before adding new shingles. The boards of your roof deck should be firm and free of damage; if they’re loose or damaged, make repairs before installing new shingles so that the new ones won’t fall off.
- Use a hammer to check for firmness and make sure the boards aren’t loose; if they are, use an appropriate tool (such as a slate ripper) to chip away at them until they’re all level again with each other and their neighbors above/below them.
As you start your project, the first step is removing old roof shingles. It should be relatively easy if they’re lying in place. You’ll need to use a hammer and pry bar to remove them.
Ensure all of these are to remove roof shingles before installing new ones; anything left behind can cause problems with leaks or even fire. If you do need new shingles, make sure to get high-quality ones.
These will generally have a higher number of granules per square foot and be able to withstand more wind and rain than lower-quality shingles. Once you have removed roof shingles, remove any nails or staples left behind. If there are lots of them, use pliers or a flathead screwdriver to pull out the pins by hand.
Check Roof Decking For Damage
- Check the roof decking for damage.
- Look for leaks and cracks in your roof’s flashing, which is the metal that goes over the edge of your roof and seals out moisture. You can check this by looking at the outside of your home.
- If you see a gap between the flashing and shingles, it may indicate that they’ve been damaged or need to be replaced. Also, look for missing shingles on the roof surface; if there are large patches where no shingle remains, severe damage may have occurred.
- Check for damaged flashing by opening windows near where you suspect there could be problems with water penetration into your attic or interior walls during rain storms. If you hear dripping from inside walls or ceilings, there is likely some leak somewhere.
Make sure any debris from the old shingles has been removed from your roof before installing new ones. If they’re not, you can use a nail remover tool to remove them, make sure all the nails are removed before installing new shingles.
If you need help with what to look for, hiring a professional roofer to inspect your roof can be helpful. They can tell if any damage has occurred, how bad it is, and what needs to be done next.
If you have a metal roof, it’s essential to check that all fasteners are secure. If they aren’t, they will rust out and allow water to penetrate your attic or interior walls during rain storms.
Ensure It Is In Good Condition
Remove roof shingles and inspect your roof deck to ensure it is in good condition before installing new ones. Remove up to three rows of old shingles at a time, and do so only in a zigzag pattern.
Remove the nails one row at a time, saving them for reuse as necessary. If you need to remove roof shingles more than three rows at once, use a hammer and pry bar to pull off the damaged material instead of drawing each nail individually with your hands or pliers.
Once you’ve removed all of the old asphalt or fiberglass-reinforced polymer (FRP) roofing from your home, look at what’s left: the underlayment that lies atop your roof decking—the plywood or felt paper beneath which sits most modern roofs’ waterproof membrane.
Inspect this layer for damage. if you see cracks or holes where water could enter your attic space during rainstorms or heavy winter snows. Repair them as needed with spray foam insulation or other appropriate materials before installing new shingles on top.
Use a level to ensure that all the boards are flat; if there’s any unevenness, hammer down the high spots until they’re level with the others.
Check for damaged flashing by opening windows near where you suspect there could be problems with water penetration into your attic or interior walls during rain storms. If you hear dripping from inside walls or ceilings, there is likely some leak somewhere (though this does not necessarily mean it’s due to inadequate flashing).
Remove any debris collected under your shingles, such as leaves and twigs, before installing new ones. Sweep the surface clean with a broom or leaf blower to prepare it for new shingles.
Final cleaning of the roof. Almost done, but just a few more steps. All the flashing, shingles, nails, and underlayment should be thrown into the trash container. Now it’s time to broom off any leftover dirt.
The roof could be slippery, and there could be a few nails that you still need to remove. Take your time and pull out any remaining nails, small parts of shingles, and dirt.
Protect the roof using the ice and water barrier. Once everything is torn off, the top is weak. Protecting the roof from direct sunlight, rain, and snow is essential. Install ice and water barrier and 30 lb asphalt-saturated felt.
These work as temporary underlayments to prevent being damaged by the weather. Start from the rake edge of the roof and align the barrier with a chalk line. Staple the top parts to hold them and finish the whole piece lining up the wall. Then, peel off the backing and put it back in place.
Clean up before going back to the ground. Before you climb down to the ground, clean any debris out of the gutters. Make sure to remove any nails and small shingle parts because you don’t want them to slide off the roof the next time it rains. Broom the top multiple times.
Conclusion
Removing shingles from a roof is a fairly straightforward process that anyone can do. It would be best if you always took safety precautions, so wear protective clothing and eye protection while working on your home’s exterior.
The most important thing to remember when removing old shingles is to remove all the old parts to prevent them from sliding off the ground. Injuries are the last thing you want to happen. Immediately protect the roof once done with removals, and always have safety gears on.